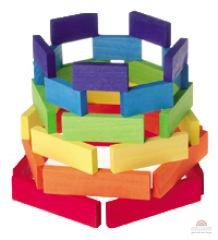
Painting wooden toys

The natural durability of objects made of wood gives them exceptional value. A wooden toy is a simple but timeless gift. How much joy can a renovated rocking horse or a set of blocks, which we ourselves had in our childhood, made?
Contrary to appearances, it is not difficult to renew toys made of wood and you can do it yourself, with a small amount of time and work. We can then be sure that the subject we receive from us will remember for a longer time. It is durability that distinguishes wooden gifts from modern toys made of plastics. Who knows, maybe the recipient will decide to restore it once and pass it on?
In addition to the simple tools to unscrew the moving parts of the toy (if it has one), we will need: a brush, sandpaper and a suitable means to protect the wood. There are many varnishes on the market, but we should choose a preparation that is friendly to particularly sensitive people. The best choice will be VIDARON Acryl Clearcoat Acrylic. It's a quick-drying agent with a mild, non-irritating odor. It meets the strict requirements of the European standard PN EN 71.3 - Toy Safety. And it can be used without fear in objects that children have contact with, as it is made of materials that are safe for health.
Surface preparation
We unscrew all moving parts of the toy and we paint them individually. Surfaces should be smooth, dry and free from contamination. Rub the greasy place with the extraction gas and dry it.
Before painting, all elements are sanded with sandpaper. We choose its graininess to the degree of unevenness of the substrate. When making sanding, remember also hard to reach places. We dust up the collected dust.
First layer application
After opening the can with the preparation, its contents should be thoroughly mixed. Painting is done with a brush or a pneumatic spray.
Remember that the ambient temperature at which we perform this operation is not lower than 5 and not higher than 25 degrees Celsius. For brushing, we use a model with synthetic bristles. If you paint with a universal brush, it is recommended to polish the bristles with sandpaper. This action softens the tips and removes loose hair.
We start painting from hard to reach places. Apply the preparation with a thick layer, which we then distribute. Joining individual planes should be done on the morko.
Second layer application
After the first layer has dried, grind the surfaces of the toy with abrasive paper with a gradation of about 320 until a smooth surface is obtained. As with the first application, remove the dust with a vacuum cleaner. If necessary, we can apply an additional layer of varnish. After the coating has dried, we unscrew the elements back together.
The final stage of the work is drying and washing the tools.
Happy painting,


